I get an error when trying to install Customer360
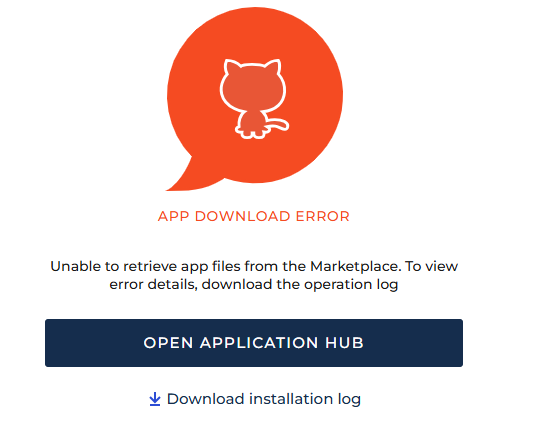
2025-12-11 17:03:31,397 System.IO.FileNotFoundException: Error occured when attempting to download the package archive from the 'https://marketplace.creatio.com/sites/marketplace/files/distribution/2025-11/CrtCustomer360App_1.13.43.zip' repository to the '' local folder ---> System.Net.WebException: Unable to connect to the remote server ---> System.Net.Sockets.SocketException: Попытка установить соединение была безуспешной, т.к. от другого компьютера за требуемое время не получен нужный отклик, или было разорвано уже установленное соединение из-за неверного отклика уже подключенного компьютера 52.31.26.85:443
   at System.Net.Sockets.Socket.DoConnect(EndPoint endPointSnapshot, SocketAddress socketAddress)
   at System.Net.ServicePoint.ConnectSocketInternal(Boolean connectFailure, Socket s4, Socket s6, Socket& socket, IPAddress& address, ConnectSocketState state, IAsyncResult asyncResult, Exception& exception)
   --- End of inner exception stack trace ---
   at System.Net.WebClient.DownloadFile(Uri address, String fileName)
   at Terrasoft.Core.ServiceModelContract.PackageInstaller.AppInstallerServiceInternal.<>c__DisplayClass27_0.b__0()
   at Terrasoft.Core.ServiceModelContract.PackageInstaller.AppInstallerServiceInternal.<>c__DisplayClass27_0.b__0()
   at Terrasoft.Core.ServiceModelContract.PackageInstaller.BaseInstallerServiceInternal.InvokeWithLogging(Action action)