Hi Creatio Community,
I'm currently implementing a custom chat channel provider by following the official documentation, and I have a couple of questions regarding the database setup.
1. Creating the provider settings table
The documentation instructs us to create a database table using a SQL script, for example:
CREATE TABLE SomeProviderMsgSettings (
    Id uniqueidentifier NOT NULL DEFAULT (newid()),
    Token nvarchar(250) NOT NULL DEFAULT (''),
    UserName nvarchar(250) NOT NULL DEFAULT (''),
    CONSTRAINT PK_SomeProviderMsgSettings_Id PRIMARY KEY CLUSTERED (Id)
)
My understanding is that creating the table directly with SQL only creates the physical database table, but does not create a corresponding Object (Entity) in Creatio.
Is that correct?
If so:
- Is it completely acceptable for this table to exist only in the database without a Creatio Object?
- Or is it considered best practice to create a Creatio Object (schema) that maps to this table instead of creating it only with SQL?
2. Registering the custom provider in the Channel table
The documentation says to add a record to the Channel database table.
However, when I look in the Configuration section, I can see several objects related to "Channel", for example:
- Channel
- ChannelPerformance
- ChannelPerformanceAIStatus
- ChannelPerformanceStatus
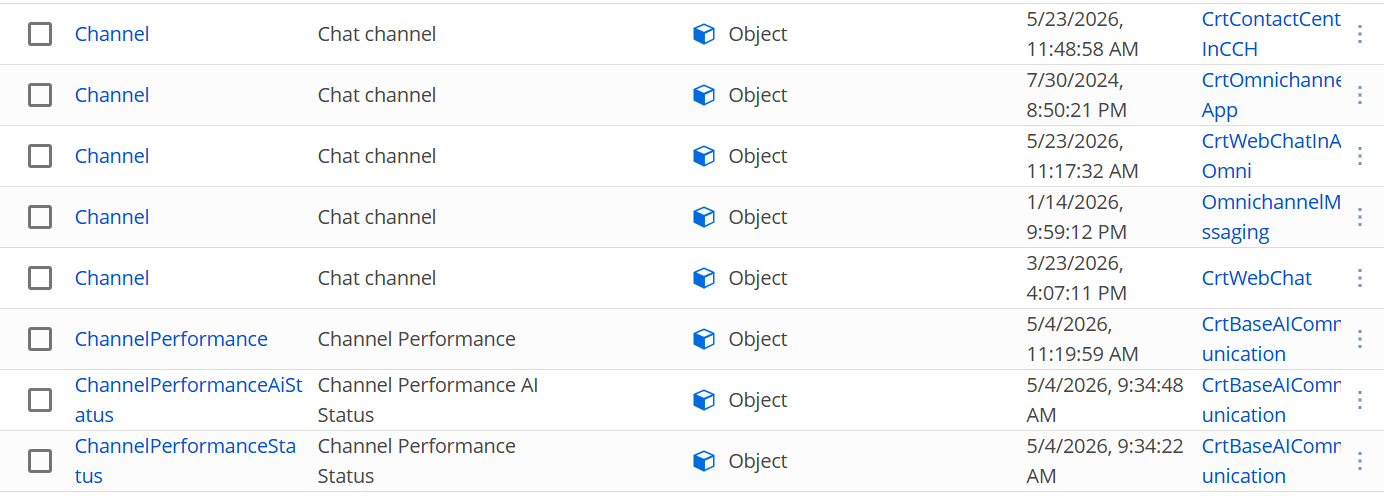
My questions are:
- Which Channel object is the correct one that should contain the record for a custom chat provider?
- Is this referring to the Channel object with the code name
Channel, or another object?
- What is the recommended way to insert the record?
- Should it be inserted directly using SQL?
- Or is there a supported way to create the record through the Creatio UI (for example, by creating a page or using an existing section)?
- If the UI approach is recommended, could someone explain the proper way to do it?
I'd appreciate any guidance or best practices from anyone who has implemented a custom chat channel before.
Thank you!