![]()
![]()
Create a Lead into Creatio CRM using Mirosoft Forms connector via Microsoft form response.
Problem Statement
A webpage created externally and linked to the Lead object of Creatio CRM to capture the response submitted in the webform and mapped it to the corresponding object (say, Lead) to create a record that involves writing code from creating a web form and integrating it to Creatio Lead object which is a time-consuming process.
Solution
Microsoft Forms connector was created which enables the organization sales team to capture the lead in a seamless mechanism and nurture to achieve a sale which also enhances the sales growth of an organization. Microsoft Forms connector utilize Microsoft Forms to create a customize lead capture form in minutes and consume Power Automate to automatically capture the form response submitted by the user which is then inserted as a record in an object of Creatio CRM site.
This article provides the guidelines about implementing the Microsoft Forms Connector.
Setup Guide for Connector
Visit the Marketplace for the Setup instruction <Marketplace Microsoft-forms-connector-creatio>.
Microsoft Forms Connector – Creatio
Pre-requisite: Kindly register with Microsoft with a valid account (Setup a valid Microsoft Account) to create a Microsoft Forms and Microsoft cloud automated flow.
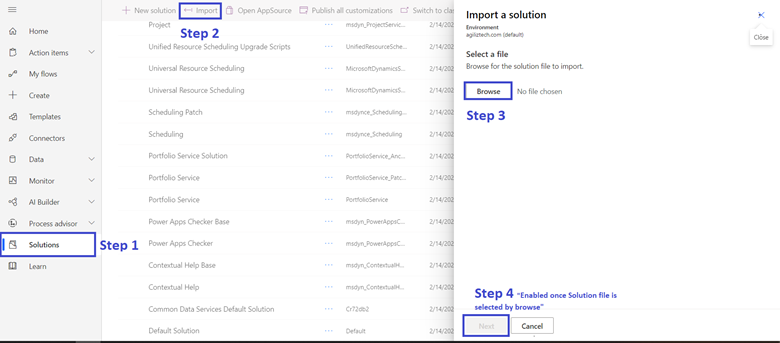
After the successful Microsoft account creation, Open the Power Automate of Microsoft (flow.microsoft.com) and select the solutions menu listed in the left panel of the window. Kindly proceed to click on the Import option at the top and select browse to choose the Zip package provided by AgilizTech. Click on the Next button and you will see an import button. Kindly click on import to install the custom created Microsoft Forms connector into your Microsoft environment.
Figure 1:
After the successful implementation, you will see a new solution named Creatio Solution added to the list as depicted in Figure 2 below.
Figure 2:

Setup for Microsoft Automated Cloud flow procedure
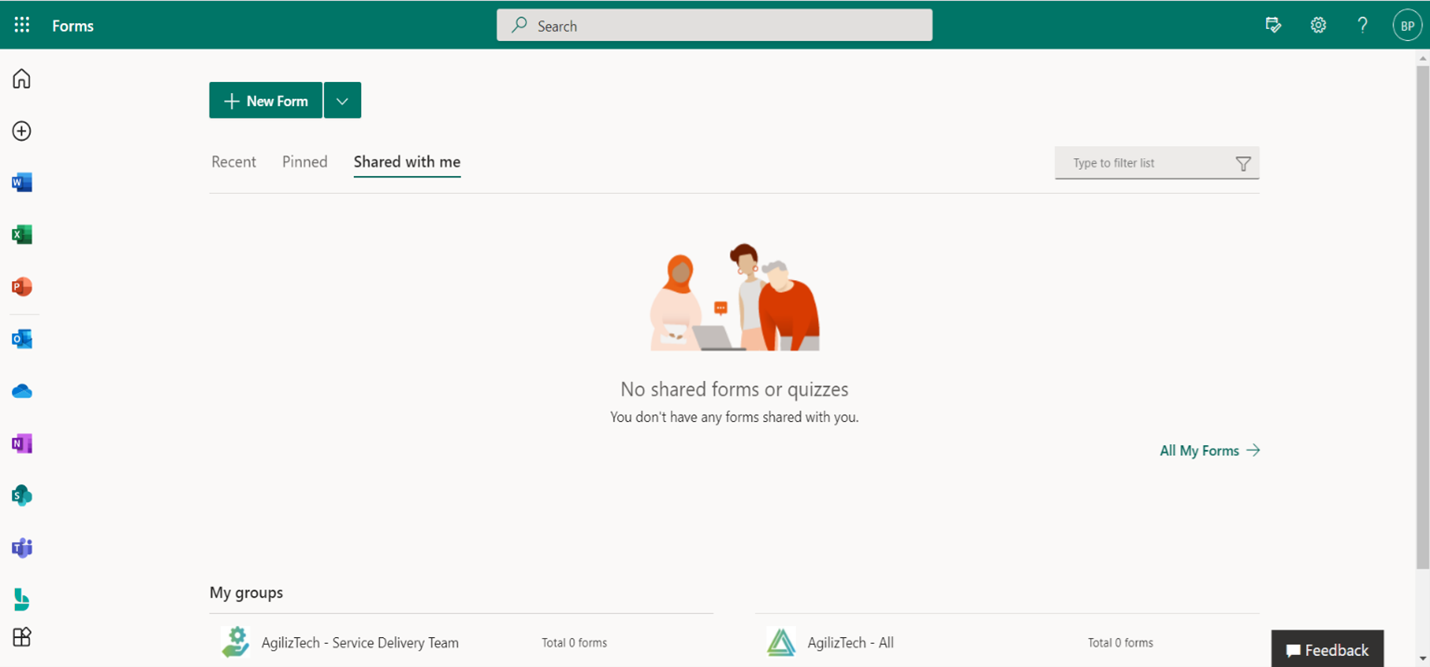
Create a Microsoft Form with the Microsoft that was created earlier. A Microsoft form can be created based on the custom business need with any of the below fields.
- Text (Paragraph)
- Text (Line)
- Date/Time
- Number
- Drop-down List
Share the Microsoft Form URL (Shorten the URL if needed) after finding the target audience and it can be shared Via e-mail and social networks also.
Figure 3:
Setup of the Landing page in Creatio CRM site
Now, create a Landing page in Creatio CRM Site which acts as a medium to allow the Microsoft Forms response to insert as a record into the Lead object.
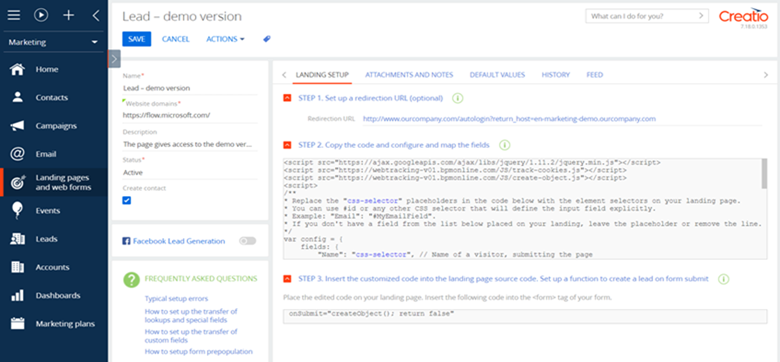
Go to Landing Pages and Web Forms section in Creatio (available in Marketing & Service workspace) and click on New, then select Lead registration form from the drop-down. Provide the Name*
for the new landing page and set the Website domains* as https://flow.miocrosoft.com since the request is sent from Microsoft flow to Creatio CRM (in consideration of authentication).
Figure 4:
Setup of Automated Cloud flow to capture a Lead into Creatio
We will create a Microsoft flow like Business Process in Creatio with its own features. Open the Power Automate and select My flows from the available menu in the left panel. Click on New flow and select Automated cloud flow from the dropdown. Set a name for your flow and set choose your flow’s trigger value* as when a new response is submitted. This helps to trigger the Microsoft flow when a Microsoft Form is submitted.
1.Select the formId value as the form name that got created (all the forms will be displayed in the displayed in dropdown select the required form name).
2.Click on Next Step to create a new step as adding a new element in Creatio BP. Select Microsoft Forms and select Actions, then choose Get Response details, then set Response Id field value as Response Id which is used to collect the values from the submitted form.
3.Click on the next step, select the custom tab in the newly added step and select Creatio connector.
Figure 5:
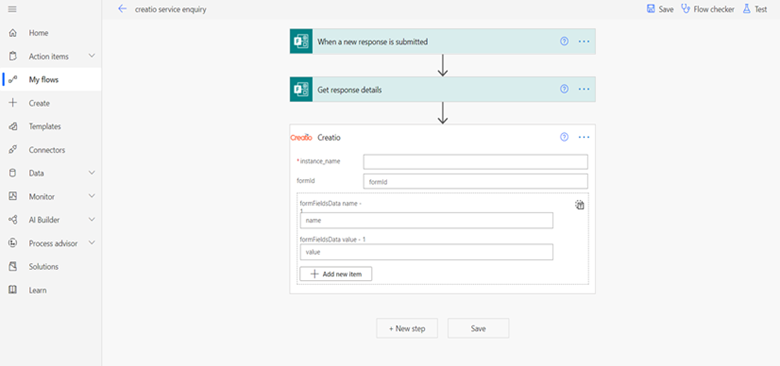
Set the instance name and formid values. Both these values are obtained from the Creatio CRM site.
*Instance_name – You Creatio CRM Site (yourdomain – www.yourdomain.creatio.com)
Formid – Your Landing page record id. (It is found inside the landing page record created in Figure 4). Now, bind the form response to the Fields of the Creatio Object and click on save.
Figure 6:
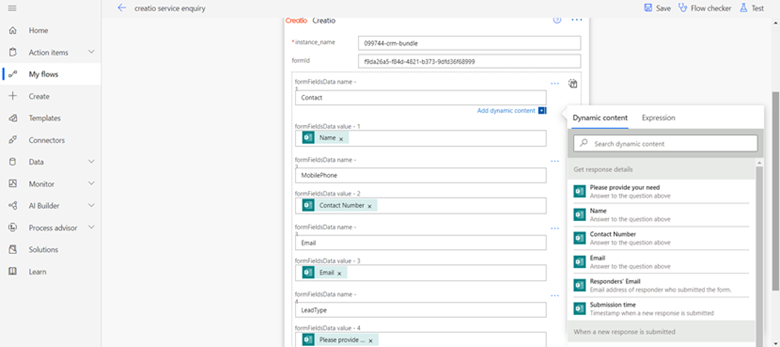
NOTE: The Creatio object field name should be provided in formFieldsData name and dynamic response is given to corresponding formFieldsData value to map the field values of Microsoft forms to the field of Creatio object.
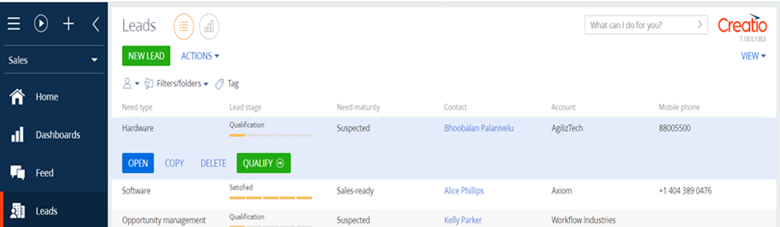
After the successful setup, when your Microsoft Form is submitted, the automated flow gets triggered which has Creatio connector (holds Target site name & Landing Page) is executed and a record is inserted into Lead object.
Figure 7:
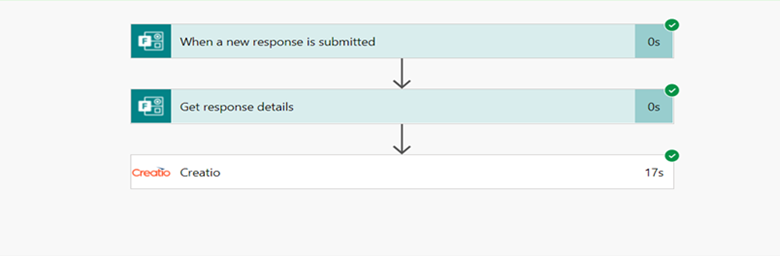
Figure 8:
Privilege of Microsoft Forms Connector
This Microsoft Forms connector helps in reducing the amount of time required to develop the code to build the webpage and minimize the amount of time required to integrate the webform response to the Creatio CRM site Lead object. This Connector acts as a single stop solution to create a lead with less investment of time, results in capturing more lead and enhance sales.